During my SOS Algarve Animal Charity Event on Saturday my trusty Nikon AF-S 80-400mm suffered a problem. I love this lens for my Dogs-In-Nature Photo Shoots because I have the ability to be far enough away to allow natural behaviour but also be able to quickly open wider when they get closer. This lens is also the perfect walk-about lens for the same reason. It is reason number 1 (of 2) why I’d rather this lens to the Nikon AF-S 200-500mm even though it has less reach. This lens and almost all my other lenses have the “gold ring” on the end of the barrel which designates it as a professional build lens (see my Equipment List). This means that it is weather and dust sealed, which is reason number 2 why I’m not a fan of the 200-500mm as it doesn’t and in this incredibly dusty environment I think it’s life could be short lived. However, as the 80-400mm lens is a zoom lens, then there is always the possibility of dust and sand getting inside the zoom barrel and this is what I think happened during the shoot. Everything was going great until suddenly the zoom ring became extremely stiff, luckily, it didn’t seize and I was able to continue with the shoot, although I always have my Nikon AF-S 70-200mm waiting as a very good substitute.
I purchased this lens back in 2013 when it was released and although it has been used extensively throughout its life, I have always taken care to ensure no damage to any of the glass or workings. So, now the dilemma, do I send it off to Nikon for repair and pay what would probably be around €1000, do I even just invest in a new one, current prices are around €2000 or do I try to repair it myself??? WHAT DISMANTLE A LENS!!!!! I have never done this before and thought, why not, I have nothing to lose as I can always opt for the first two options. After watching a few YouTube videos, albeit other Nikon lenses, I started to remove the front elements.
Here is a shot of the front element removed, you can see the small pieces of what look like ground metal filings on the other elements from where the zoom barrel was grinding.
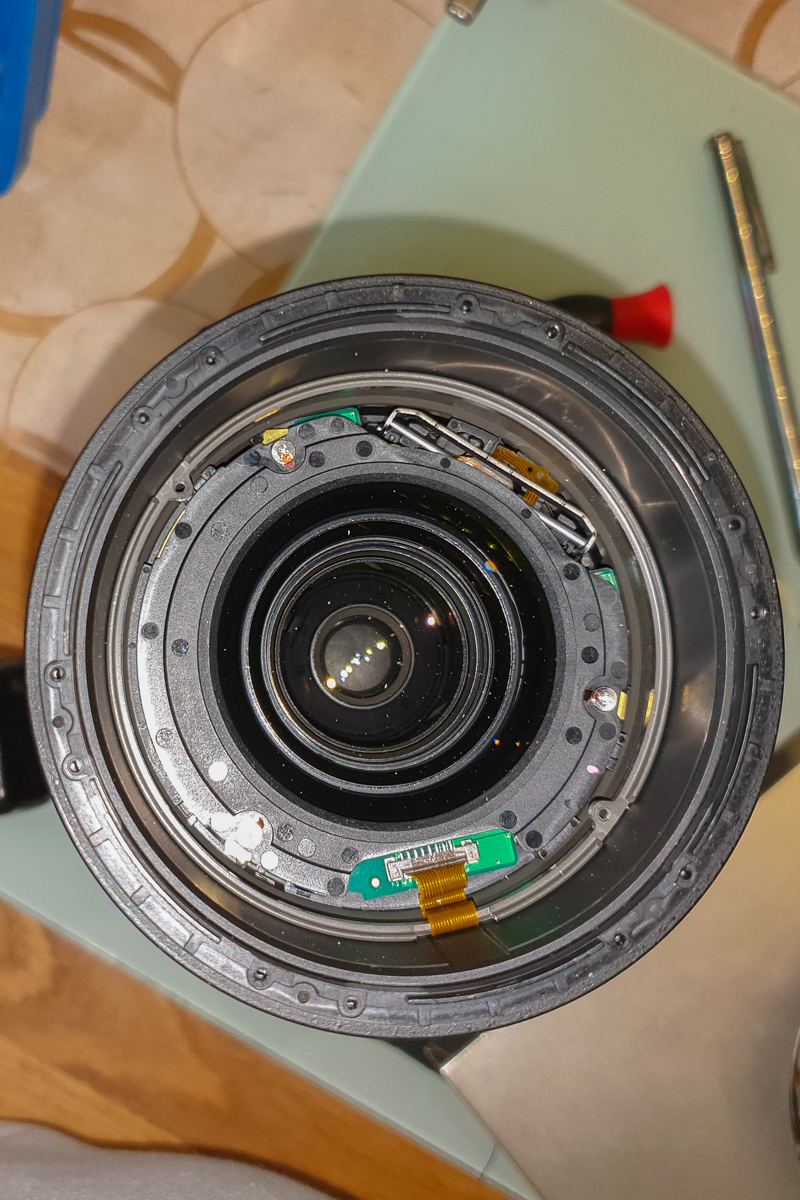
Here is the lens with the first two elements removed. You can see the long metal bar on the bottom left inside the lens, this is where the VR (image stabaliser) is attached and the entire lens structure inside moves around on this to steady the image. I didn’t really want to go any further if I could help it as this is mounted on tiny springs. What you can’t really tell from this photo is that there are some thin spacers to ensure the elements are perfect and there are also some tiny spacers too which were really difficult to get back into position. I ensured everything was organised in order to help get it back together in the correct order.

After a lot of cleaning and blowing with a Giottos Rocket Blower I realised I didn’t have to strip any further than this, phew!

So how did I fix it? Well after lots of zoom turning and blowing, eventually the zoom ring became a little looser, but still grinding. Lenses are built “dry”, they don’t have any lubrication. I guess this is due to grease attracting dust and also the possibility of stray grease ending up on a glass surface. However, after reading and watching a few YouTube videos it seems that a fix is to place small amounts of lithium grease on the zoom barrel and this is what I did! I carefully placed small amounts of grease spots inside the barrel and also some on the external side of the barrel and spent 10 minutes zooming in and out and eventually not only did the grinding stop, but also the lens movement became really smooth.
Now all I had to do was re-assemble. The 2nd element was quite tricky to do, the spacers were very fiddly and it was difficult to get them in the correct positions, but eventually after many expletives, I had it in place. Of course, I thoroughly cleaned the glass. The first element was simple, again after a thorough clean and then the filter ring followed finally with the rubber “bumper”.
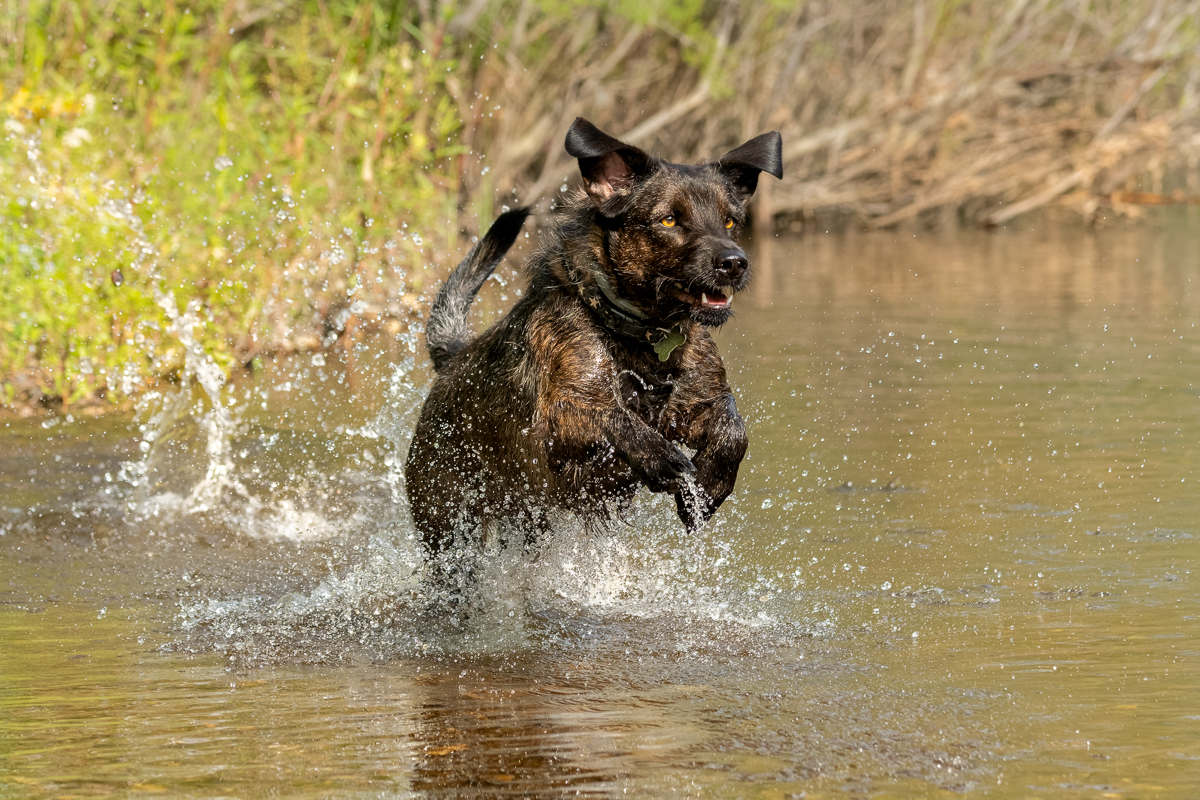
So the lens was all back together, but did it work? This morning I tested it out on Wally running towards me and jumping in the river for its continuous focusing ability then also a static shot of a plant. As you can see from the following photos, it’s perfect and doesn’t even seem to need any in-camera fine tuning either! As you can imagine, I’m very relieved! So would I recommend that you fix your own lenses? NO!!!!!!!!!! I’ve always had a great ability to dismantle things and work out how they work, although my sister probably disagrees after she found her Tape Recorder under my bed in a million pieces when I was around 10 years old, it took me a few years to work out how to put things back together!